How To Best Use Kanai’s Cube During Seasons
by JR Cook - 6 years ago show comments
Kanai’s Cube, introduced in Patch 2.3.0, has become one of the most integral tools for Diablo players that wish to take their game to the next level. The amount of power and efficiency that it can provide to both newly created and long-standing characters should not be underestimated. In this guide, I will review every recipe and talk about its significance in both the early stages and last weeks of a season.
Archive of Tal Rasha – Extract Legendary Power
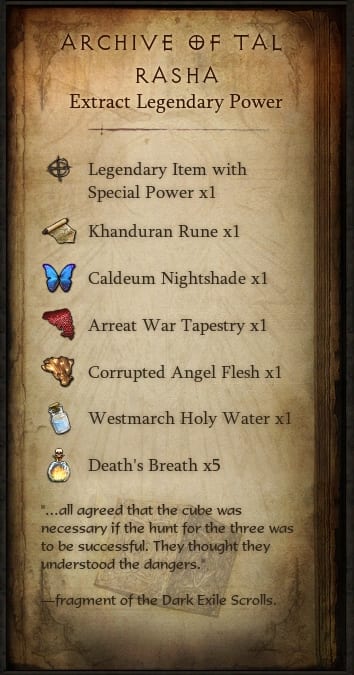
Extracting Legendary Powers from useful Legendary items is critical to the completion of any build. Early in a season, you’ll be strapped for potential powers to extract, as you’ll have to rely on which items have dropped for you or your party members. Sometimes, it may even be worth it to extract a sub-optimal power just to fill each slot (weapon, armor, and jewelry) in the Cube, since that might allow you to farm faster or move up into a higher Torment difficulty.
However, these extractions require the Legendary bounty materials, so you don’t want to over-extract and force yourself to have to do too many bounties, since this endeavor is somewhat inefficient early in your character’s career. Legendary bounty materials are going to serve you best in the next recipe we’ll discuss, so my overall advice here is to extract only the powers you need unless you find yourself stuck in the early season and feel adding a power will push you a bit further. It should also be noted that in order to complete your Seasonal Journey, you must extract 40 Legendary powers total, so keep that in mind if that’s a goal you intend to accomplish.
Law of Kulle – Reforge Legendary
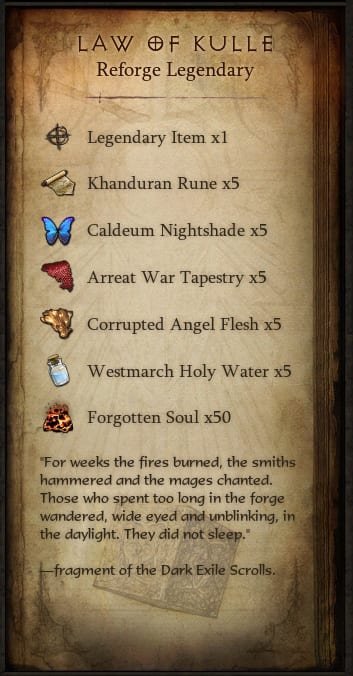
Reforging Legendary items is an incredibly powerful opportunity to find perfect items for your characters. The recipe essentially acts as if the item that you’re reforging is dropping again for your character, so it will come with new affixes, stats, and the possibility to be Ancient or even Primal if you’ve unlocked that. RNG is still at play though; your item is just as likely to turn out worse or better. My first suggestion is that when you reforge, always use a spare of an item if you’re trying to replace something you currently use (e.g. a second Blade of Prophecy if you currently have one equipped).
This recipe is easily the most expensive of the Kanai’s Cube options, so it should be used lightly. Often, players rely too heavily on reforging rather than just working with what they have. Save reforging for deeper into the season when min-maxing is the most important. I would really only reforge early in the season if you come across a particularly rare weapon or jewelry piece and it has terribly unusable rolls. You may want to then reforge it once or twice to make it usable, but don’t try to force your way into Ancient or Primal version.
The classic lesson to learn would be right after you reforge and get yourself an Ancient weapon, you then hop into your next Greater Rift and find an upgrade over that exact item. Now you’ve wasted those materials. The deeper into the season you get, though, then the less time and opportunity you’ll have to find improvements to what you currently have equipped, so reforging’s value goes way up. Wait for the two-week warning before the season is about to end and then go reforge crazy.
Hope of Cain – Upgrade Rare Item
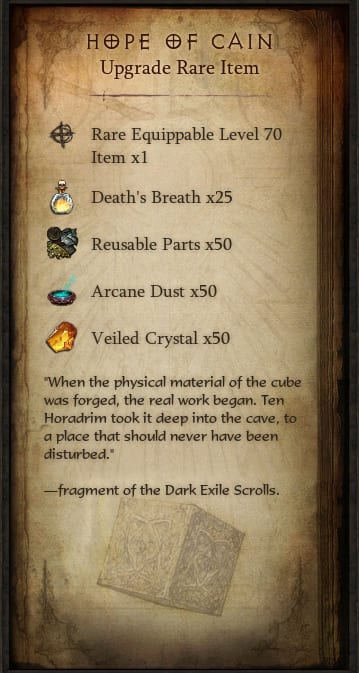
This recipe might just be the most valuable recipe in the game. Upgrading Rares is not only relatively cheap, especially once your Torment farming is at a nice and speedy level, but it can also provide you with major upgrades in a relatively short span of time. For certain characters and equipment slots, it’s the fastest way to get a best-in-slot result. The best example is the Demon Hunter’s Rare Dagger upgrades. There are only two outcomes using this method – Lord Greenstone’s Fan and Karlei’s Point. As you can see, you’d be crazy to do anything else if you wanted to get the best weapon for Impale; it’s a 50:50 chance and the results can be normal, Ancient, or Primal (if unlocked).
Early in the season, Death’s Breaths will likely be the limiting factor for how much you can utilize this recipe, so I would save upgrades primarily for weapons whenever you have the spare materials. This recipe will also require you to keep an eye on your standard crafting materials (Reusable Parts, Arcane Dust, and Veiled Crystals), since you need to keep them balanced. There are recipes we’ll discuss in just a moment that can assist you with that. Late in the season, this recipe still has value, since you’ll like have no other use for Death’s Breaths. Target your weakest equipment slot and maybe you’ll find a last-minute upgrade.
Skill of Nilfur – Convert Set Item
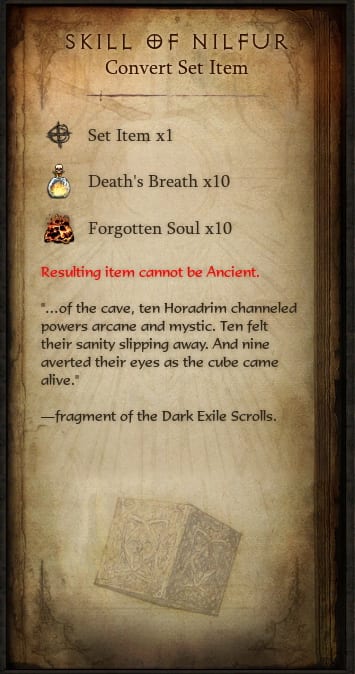
This recipe used to be a bit more important before the days of Haedrig’s Gift. When completing sets was a more RNG affair, it was fairly common to end up with a situation that saw you holding a chest piece, boots, and five pairs of gloves for your desired set. If luck wasn’t on your side, it could take forever to find the other remaining pieces of the set, even though you had technically already found seven items belonging to that one set. Thus, this recipe was established to cure that problem by giving you the opportunity to take those extra gloves and convert them, randomly, to other pieces of the same set. So, if they were Unhallowed Essence gloves, for instance, you would use this recipe and they would magically turn into the cloak or the helm or some other piece of the set.
As you can see, you CANNOT use this recipe to create Ancient versions of any set pieces, so it’s really only useful for when you are rushing to complete a set. Also, know that any piece you use originally to convert cannot be the outcome. For example, if you convert gloves, the recipe will not give you gloves as a result. However, if those gloves turn into pants and you then convert the pants, then gloves are back on the table as a potential result.
All in all, the most practical use you’ll get from this recipe is if you’re trying to gear an alternate character or if the Haedrig’s Set for your class isn’t one you’re interested in, but you haven’t had good luck farming pieces for the set you actually want. If the set you’re using has rarer pieces like a weapon or jewelry, you can also use this conversion to make better versions of those in a potentially less expensive way than normal.
Work of Cathan – Remove Level Requirement

This recipe doesn’t have much bearing on increasing your power during the span of a season. If you’re a player that likes to rely on solely themselves, then you might use this recipe to remove the level requirement from select pieces of gear so that if you ever need to powerlevel a new character quickly (or if you die on a Hardcore character), you can do so with the comfort of Level 70 affixes and set bonuses. However, the Gem of Ease can reduce the level requirement of a high-powered Ancient weapon and both the Hellfire Amulet and Hellfire Ring are wearable at Level 1 naturally, so you don’t really need to go to the extra effort of removing the level requirement of many pieces via this recipe.
Darkness of Radament – Convert Gems
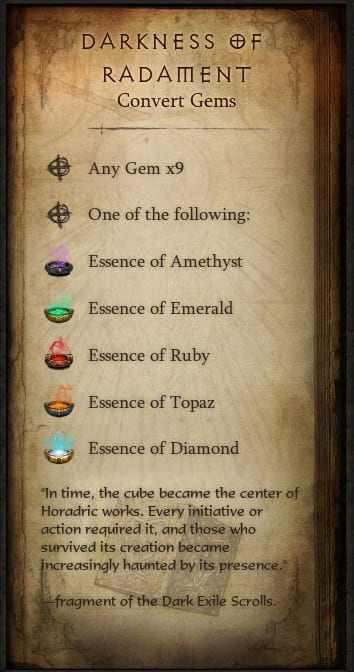
An often overlooked recipe, this particular mechanic is great when combined with a recipe that we’ll cover a little later – Caldesann’s Despair. Since the game now has a Legendary and regular gem sink due to augmentation of Ancient gear, you’ll eventually find that throughout a season, especially if you’re a Hardcore player and you’ve died once or twice, you will run out of the particular gem that you’d like to augment your gear with. Rather than trying to farm more Emeralds or Rubies or Topazes specifically, you can take your massive pile of Amethysts, for example, go to Squirt the Peddler in Act II, grab the proper Essence that corresponds to the gem type that you’re looking to get more of, and combine that Essence with 9 of a tier of gem in the cube to convert it.
For a real world example, say you need more Flawless Royal Emeralds, but you’ve run through your entire stockpile of Emeralds. If you have a bunch of Topaz gems, you can upgrade them to 9 Flawless Royal Topazes, grab the Essence of Emerald from Squirt, and then turn those Amethysts into Emeralds in Kanai’s Cube.
Pleasure of Iben Fahd – Convert Resuable Parts
Regret of Iben Fahd – Convert Arcane Dust
Wrath of Iben Fahd – Convert Veiled Crystals
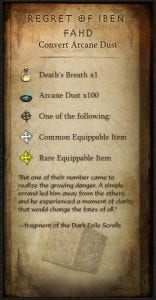
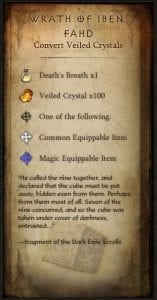
We’re going to cover all three of these at once, since they all effectively do the same thing. If you find yourself with an uneven amount of crafting materials, like I previously mentioned when discussing the Hope of Cain recipe, these are the recipes that you want to take advantage of to restore the balance. In general, you’ll find that doing bounty runs will gain you many crafting materials in a rather short period of time in a mostly balanced fashion with maybe Veiled Crystals coming up short a bit, but if you go on a session of Greater Rift runs, you’ll likely end up with your Veiled Crystals being miles ahead of your other materials. To get things even again, all you have to do is use an item of corresponding rarity (a white item, blue item, or yellow item) that represents the material you’d like to increase and choose the recipe that corresponds to the material that you have too much of to use it in the conversion.
Caldesann’s Despair – Augment Ancient Item
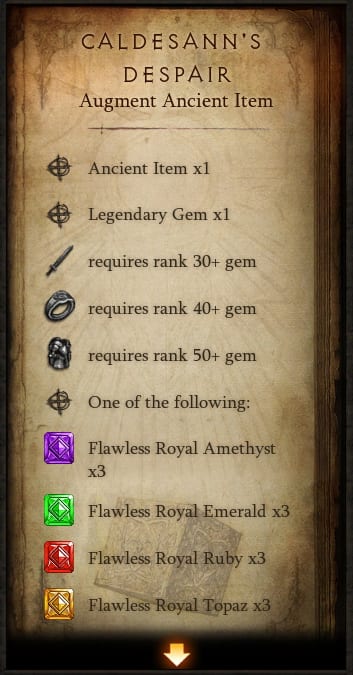
While I previously proclaimed that the Hope of Cain might be the most important recipe in Kanai’s Cube, Caldesann’s Despair certainly gives it a run for its money. The power granted from augmenting a fully Ancient setup should not be taken lightly. In the early days of Diablo III, it was a sign of great gear if your main stat started to get close to or exceed 10,000. With Caldesann’s Despair, that benchmark is now in the 20,000s and going higher with each season. This recipe allows you to sacrifice 3 max level regular gems – Flawless Royal tier – plus a ranked up Legendary Gem (with the recipe showing you the minimum ranks required for certain slots – weapons require at least Rank 30; jewelry requires at least Rank 40; and armor requires at least Rank 50) to augment your selected piece of gear with more attributes based on the corresponding color of the regular gems used.
- Dexterity, use Emeralds.
- Intelligence, use Topazes.
- Strength, use Rubies.
- Vitality, use Amethysts.
Do not make the mistake of using any color gems all willy-nilly. You will lose your ranked up Legendary gem and the process cannot be reversed. Your piece of gear isn’t ruined forever however. You can always overwrite an augment with a new one, whether that’s changing the attribute or using a higher or lower rank Legendary gem. Each rank of the gem corresponds to 5 attributes, so a Rank 50 Legendary Gem would provide you with 250 attributes, for example.
During a season, I would use this recipe sparingly early on, as your gear will likely be changing quite a bit, unless you get lucky with some well-rolled Ancient or Primal Ancient pieces at the outset of the season. Once your Ancient gear starts to settle and you feel like you won’t be replacing pieces too frequently, you can begin to think about augmenting. You should have an idea of how many times over the course of the season you’ll want to augment your setup since augmenting with lower rank Legendary gems means you’ll have to grind to level up new ones before you can put a higher ranking augmentation on that same piece. Some people employ a strategy of waiting until they have a nice supply of Rank 70 Legendary gems, for example, and then augmenting their gear all in one go. They’ll then plan to do another augmentation round to update their augments to Rank 90 or so and then maybe go for a final augmentation round in the Rank 100-110+ range.
Lastly, while the type of regular gem matters for which attribute you’ll get, the type of Legendary gem has no bearing on the result. You should not however that some gems do have a cap (Boon of the Hoarder at Rank 50, Iceblink at Rank 50, Esoteric Alteration and Mutilation Guard at Rank 100, and Gogok of Swiftness at Rank 150), so if you want to go higher than the cap on those gems, don’t level them for the purposes of augmentation.
We hope you found this guide to be useful and aid you in your quest to become a better player. See a tip that was missed or have a question that wasn’t answered? Leave us a comment and let’s continue the discussion!